Jumping to the meat and potato a short set of instructions are presented on how you can have a WordPress instance up and running in under 10 minutes on your Raspberry Pi 3+ using docker-compose.
Preperation / Prerequisite
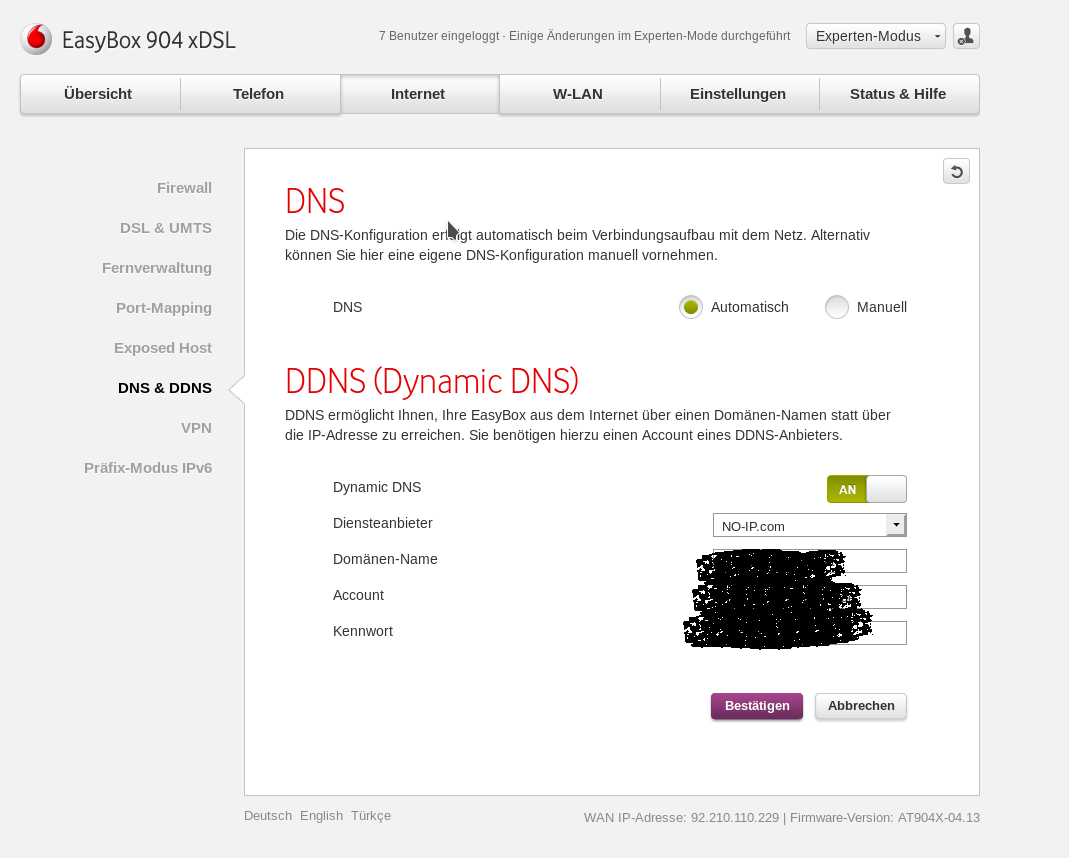
To start off: what you want is a domain name. Since you will be hosting your Raspberry Pi from home and most likely will not have a static IP you also need to tell your domain provider about your changing IP. Luckily no-IP provides both a DDNS service and free domain names. My router also had an option to inform no-IP about my changing IP.

Also don’t forget to forward the ports 80 and 443 which will be incoming traffic to your website. If you are going bigger and get your own domain name you could configure Cloudflare as your nameserver. By establishing a CNAME link to your free domain name at no-IP your new domain name will automatically resolve to the dynamic IP address. An advantage using Cloudflare is, that as a content delivery network, it can cache your website. Additionally it also provides TLS certificates.
Now i assume you already managed all this and have your Raspberry with an installed OS, mine is Raspbian, ready to go . Also ideally we have docker and docker-compose installed, if not just run the following two commands.
curl -sSL https://get.docker.com | sh
sudo apt-get install docker-compose
Lets get started – Installing WordPress using docker-compose
First clone the following repository first, this will include all necessary additional configuration files.
git clone https://gitlab.com/nm_hung93/dockerized-wordpress-on-raspberry-pi.git
For a quick overview, the docker-compose file looks like this:
version: '3'
services:
 caddy:
  # our webserver build for ARM
  image: hunnguye/caddy-alpine-armv7:1.0.3
  volumes:
   - "./data/wp:/srv"
  depends_on:
   - mariadb
   - php
  ports:
   - "80:80"
   - "443:443"
  restart: always
  env_file:
   - "./data/env_variables/caddy_env"
  networks:
   - wordpress

 php:
  #  the PHP engine based on the official image and added some modules to satisfy WordPress needs
  image: hunnguye/php7.4-rc-alpine3.1-fpm-mysqli-armv7:7.4-imagick
  links:
   - mariadb:mariadb
  volumes:
   - "./data/wp:/srv"
  restart: always
  networks:
   - wordpress

 mariadb:
  # our out of the box database
  image: yobasystems/alpine-mariadb
  volumes:
   - "./data/db:/var/lib/mysql"
   - "./data/restore:/restore"
  restart: always
  env_file:
   - "./data/env_variables/mysql_credentials"
Mount Points
We could now configure the mount points of our docker-compose.yml. Per default they will be created in the same folder in which we cloned the repository.
Lets go through every mountpath of the containers:
-
- Caddy:
- ./data/wp:/srv > this is the location where we will install WordPress
- ./data/cloudflare_certs:/mnt/cloudflare_certs > i am using cloudflare’s certification and am saving them on my host system you don’t really need this line but it doesn’t break the system either
- PHP:
- ./data/wp:/srv > This is the same mountpoint as the WordPress installation so that the PHP engine can access the same files
- MariaDB:
- ./data/db:/var/lib/mysqlMariaDB persists its data at /var/lib/mysql. Since we want to save this stateful data we need to mount it to our host system.
- Caddy:
It is possible to create a database when initiating the MariaDB container. This can be done through injected environment variables which we specify in /data/env_variables/mysql_credentials.
This is the content which will be needed for your first test run and should be consistent with the wp-config.php
# set root password for querying inside the container
MYSQL_ROOT_PASSWORD=root-pw

# below values should match wp-config
# this will be your new DB and the credentials you use to initiate your WordPress
MYSQL_DATABASE=blog
MYSQL_USER=UserX
MYSQL_PASSWORD=123456
Downloading and configuring WordPress
The provided repository and docker-compose only act as a skeleton, which we still need to fill with life (WordPress). Therefore, being still in the root folder of the repository we can now download WordPress:
curl -sL http://wordpress.org/latest.tar.gz | tar --strip 1 -xz -C data/wp/www
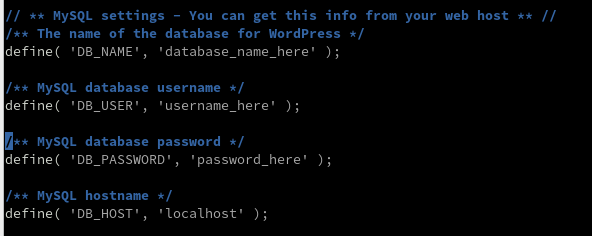
Navigate to our WordPress installation folder and copy the wp-config-sample.php and edit it. If you are still in your root folder it should look like this:
cd data/wp/www/
cp wp-config-sample.php wp-config.php
nano wp-config.php

Change the settings accordingly to our initiated database:
- ‘database_name_here’ into blog
- ‘username_here’ into UserX
- ‘password_here’ into 123456
- ‘localhost’ into mariadb
Save the file with CTRL+X and accept saving the file with Y.
Run WordPress with docker-compose
Now we are all set. Navigate into our root folder (of the repository) again and run docker-compose with
docker-compose -f docker-compose.yml up -d
- -f specifies the file
- -d means detached meaning it runs in the background
The Console should look like this:

Now find the IP address of your Raspberry Pi for example with:
ip addr show
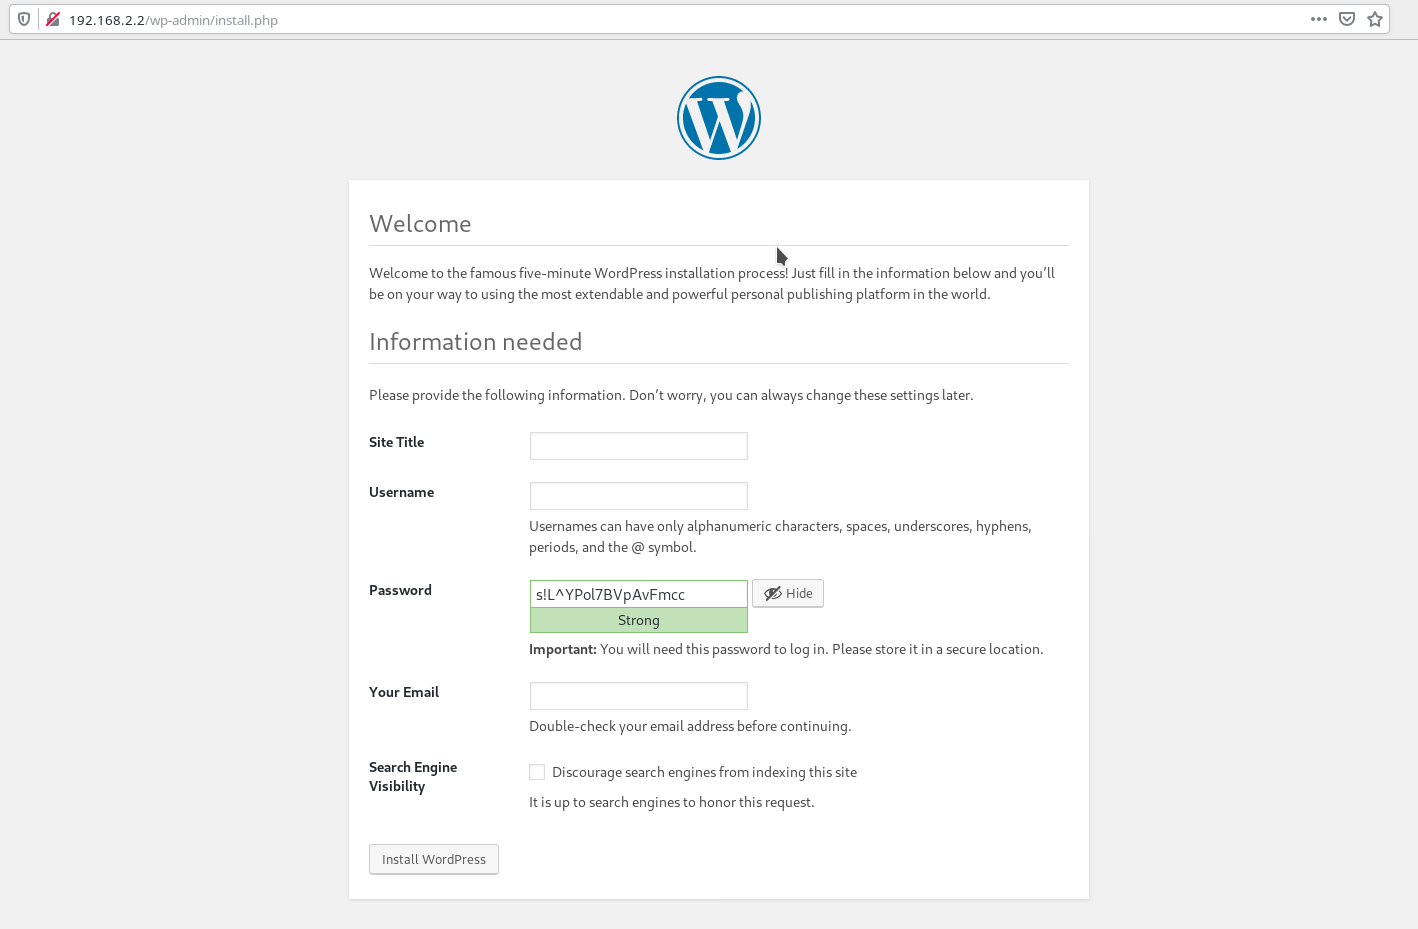
And look out for eth0 or wlan0 depending on your used network interface. Mine is 192.168.2.2. We can now go to another machine inside our network and insert this IP address into our browser.


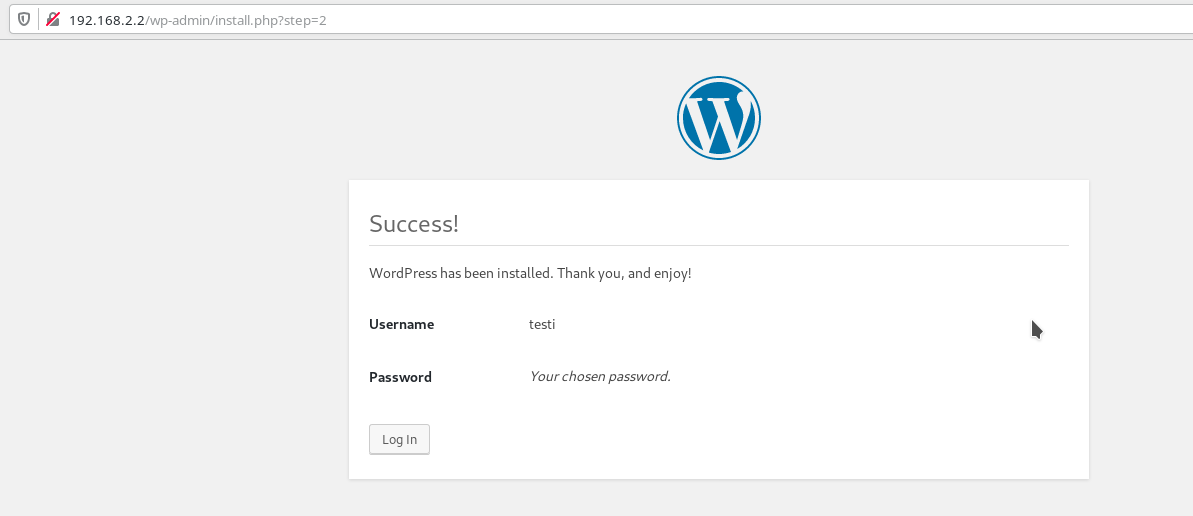
SUCCESS we did it
Now the next steps you could do are :
- mount the folders to another directory
- edit the Caddyfile such as commenting tls off, and replacing :80 with yourwebsite.com to actually serve your website on https
- edit the /data/env_variables/mysql_credentials file to have more customized database credentials
- if you want to change the upload max size, uncomment the mount of the php.ini file, which is already provided in the repository
<<< Previous: #0 Introduction to Docker and WordPress
>>> #2 Containerized WordPress: General troubleshooting and Migration
Hi Hung,
I was wondering if it’s possible to bind the web server to a certain IP rather than having it default to *:80. I have pihole running on my pi and have created two IPs in which I statically assigned one to pihole. I want to be able to bind the secondary IP to the webserver. Will it be possible to add it to docker-compose to statically bind this IP? Thanks for the help!
Hey Kobe,
that is an excellent question and depends on your overall network infrastructure and docker setup. If you run all services (wordpress and pihole in your case) in docker there is no need for multiple IP addresses.
Just assign different host:container port mappings in the docker compose. “You can map other ports to Pi-hole port 80 using docker’s port forwarding like this -p 8080:80 if you are using the default blocking mode” see here. So in this example your wordpress would be available at IP:80 and your pihole (its web UI) would be available at IP:8080.
Another way would be using a reverse proxy, which redirects traffic on the same port (in this case port 80) to different resources depending on the target domain address. The docker-compose of this How-To even includes such a reverse proxy setup (Caddy). However i think this is overly complicated and i would rather stick to the workaround above.
Personally i didn’t setup pi-hole (yet), so this is just a somewhat educated guess on how to tackle your problem. Feel free to provide feedback :).
Best Regards
Hung
Thanks a lot,
Best step by step that I found today 21.03.2021 on the web.
Mihai
Hi Hung.
Thanks for getting back. I had solved it by getting the ssh plugin to work however the direct approach is much nicer so thanks for that.
/ Christian
Hi.
I have set this up and it was no problems.
But how to update the plugin themes etc.
Am i supposed to install ftp server directly on raspbian or add it to the docker? Or is it update manually only via ssh command line etc? Any tips or pointers?
I also tried with the “SSH SFTP Updater Support” plugin for wordpress but I can’t get it to work probably because of the docker container.
Hey Christian,
i am sorry to get back to you so late, i hope you didn’t give up on that topic yet.
That is indeed a good question i am sorry not to already include the answer in the walkthrough.
There are two ways you can achieve this:
1. install WordPress plugins directly without ftp
link
You should add the following line to your wp-config.php which should be located under [git-repo-dir]/data/wp/www/wp-config.php.
define('FS_METHOD', 'direct');2. you could ssh into your raspberry pi and download the plugins with wget manually and unzip it.
The plugins should be located inside the folder
[git-repo-dir]/wp/www/wp-content/plugins
If you have any further questions you can reach me by mail [email protected].
Best Regards
Hung
Thanks, that was it. I had Model 2 B that I tried.
Sadly, it fails on the finishing lines. I did a fresh install of Pi and followed closely the whole setup (including the steps at README.md), but I only get the following errors. Any idea what I could do?
dockerized-wordpress-on-raspberry-pi_php_1 exited with code 139
dockerized-wordpress-on-raspberry-pi_caddy_1 exited with code 132
caddy_1 | Illegal instruction (core dumped)
caddy_1 | Illegal instruction (core dumped)
caddy_1 | Illegal instruction (core dumped)
dockerized-wordpress-on-raspberry-pi_caddy_1 exited with code 132
dockerized-wordpress-on-raspberry-pi_php_1 exited with code 139
caddy_1 | Illegal instruction (core dumped)
caddy_1 | Illegal instruction (core dumped)
caddy_1 | Illegal instruction (core dumped)
caddy_1 | Illegal instruction (core dumped)
caddy_1 | Illegal instruction (core dumped)
dockerized-wordpress-on-raspberry-pi_caddy_1 exited with code 132
caddy_1 | Illegal instruction (core dumped)
caddy_1 | Illegal instruction (core dumped)
caddy_1 | Illegal instruction (core dumped)
caddy_1 | Illegal instruction (core dumped)
caddy_1 | Illegal instruction (core dumped)
caddy_1 | Illegal instruction (core dumped)
caddy_1 | Illegal instruction (core dumped)
dockerized-wordpress-on-raspberry-pi_php_1 exited with code 139
dockerized-wordpress-on-raspberry-pi_caddy_1 exited with code 132
caddy_1 | Illegal instruction (core dumped)
caddy_1 | Illegal instruction (core dumped)
caddy_1 | Illegal instruction (core dumped)
caddy_1 | Illegal instruction (core dumped)
caddy_1 | Illegal instruction (core dumped)
caddy_1 | Illegal instruction (core dumped)
caddy_1 | Illegal instruction (core dumped)
caddy_1 | Illegal instruction (core dumped)
caddy_1 | Illegal instruction (core dumped)
Hey Jani,
i never encountered that issue before, however seeing the output “illegal instruction” seems to hint of different CPU architecture.
I did a quick google search and by any chance do you have anything else besides a Raspberry Pi 3+?
(https://github.com/caddyserver/caddy/issues/748)
You can also reach me through mail @[email protected] and I’ll try my best to help you out
Best Regards
Hung
Trying this using armbian/debian (Buster) and hitting this bug when running the docker-compose command: https://github.com/docker/compose/issues/6935
I don’t see any workaround to the issue. Just posting this in case anyone else hits this and comes up with a workaround. But is still open as of Feb 2020.
Hi there, terrific post. I am trying it as of now, being a neophyte in docker and docker-compose and wanting to serve a few very low traffic websites from my Pi it is perfect.
A few comments that come up while following it:
– root folder: it was not immediately clear to me if root folder was the root of he Pi filesystem or the base dir of what I had pulled from git. it made sense having a look at where the data folder was and took it from there.
– with regard to mysql credentials, instead of having a file /data/env_variables/env_file I fount a mysql_credentials file. I guess it’s that one
I have been wating to look into docker-compose for a while. But containerization really shines when you try and have more than one copy of some service running. i.e. runnig two distinct blogs on the same machine. It would really be appreciated if you could show us (me? 🙂 ) how to be able to do so, leveraging docker-compose, where to touch and what to change to do so ….. it would make for a great blog post sequel. Many thanks
Hey Massi B. ,
thank you for your kind comment and feedback – i do appreciate it! 😀
Using Docker and Docker-Compose is indeed thrilling but also has a steep learning curve if you never actually worked with such a tool as i experienced it myself with days of sleepless nights. But it really pays off because everything is just so clean and neatly structured.
Your Use-Case of running two WordPress instances does not necessarily call for two separate containers. What you actually want is, that the one webserver serves two different types of contents depending on the target URL. This can be achieved by configuring the Caddyfile pointing to different mounted folders. (The mount points are again specified in the docker-compose.yml)
This might then look like this
website1.com {

root www/

}
website2.com {
root www2/
}
If you need any help with the configuration feel free to ask 🙂
Best Regards
Hung
Additionally it also provides TLS certificates
Exactly, Caddy does provide an automatic integrated service which provides free TLS certificates provided by Let’s Encrypt.
In another group project i observed that many people struggled getting a trusted certificate for their webservices. In this case, if you let Caddy handle all the traffic, it can automatically provide free TLS certificates and act as a reverse proxy to route traffic to the original destination of your webservices.
Very well documented and easy to understand, nice work! Looking forward to your next post!